California divers do a lot of offshore diving, and we’re fortunate to have at least 50 dive charter boats who regularly take scuba divers out for single or multiple days on the water. Additionally, every year thousands of others scuba dive off their own private boats or leave the shoreline to explore nearby islands, wrecks, to take photos and video, or to pursue lobster, abalone, and fish. With 840 miles of coastline, there are countless dive sites to explore.
Scuba diving off a boat and even off the shore requires specialized skills and additional safety equipment. An inflatable surface market buoy (SMB, or a “safety sausage”) and plastic whistle are absolute minimums; some divers also carry the Dive Alert air horn for signaling at the surface. A strobe light, mirror, and/or flashlight can also be used to get the attention of boats and rescuers at the surface in an emergency situation, and at least some of the above are mandatory gear on any commercial charter.
Although it’s rare, there are times when scuba divers become separated from their dive boat or shoreline entry/exit area due to currents, a poorly planned navigation route, becoming distracted, or changing conditions. There are also times when a diver needs assistance but is not within the view of other divers who can assist – directly off the bow on a large boat, for example, or in a remote area where they are not easily seen. In a distress situation, quickly getting the attention of others and having the ability to summon help is critical.

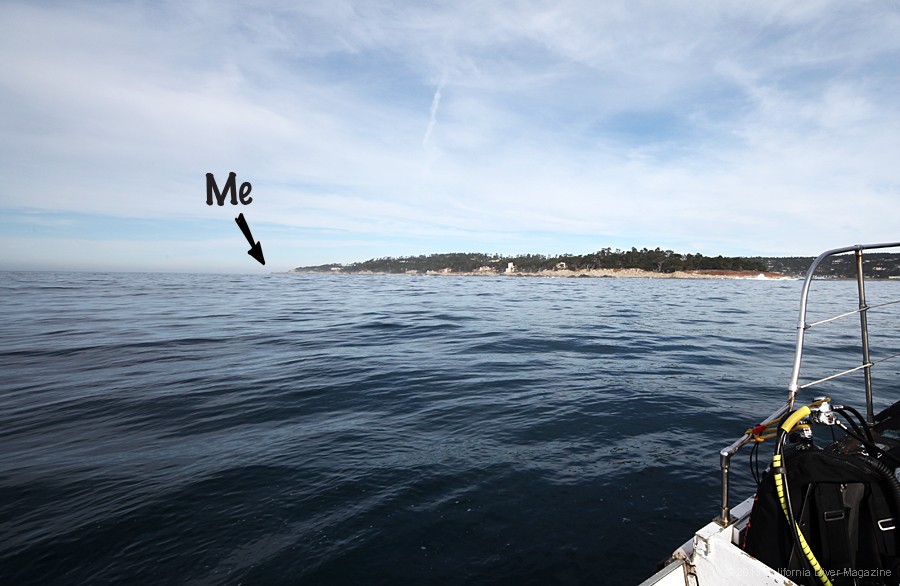
Even under ideal conditions, it’s nearly impossible to spot a distressed diver at a distance.
From the perspective of the people on the boat or standing on the shoreline, only a diver’s head and maybe a bit of their shoulders are visible above the waterline, and appears not much larger in size than a basketball. Add some swell, chop, and whitecaps and the diver is essentially invisible from just a few hundred yards away. Any veteran search and rescue personnel will tell you that actually rescuing a diver in these conditions can be relatively easy; it’s locating them that’s often nearly impossible.
As much of a nightmare is for a diver being lost in the water, any experienced boat captain will tell you that being unable to locate a diver after a dive is among their worst fears as well. Mike Lever knows the feeling, and is one reason he developed the Nautilus Lifeline.
Mike was a liveaboard boat captain with more than 19 years experience, and spent several years developing a better solution to dramatically increase diver safety. After years of trial and error using many different approaches to improving diver safety, he developed a portable, submersible VHF radio that divers can take with them on their dives, and the Nautilus Lifeline was born.
Description
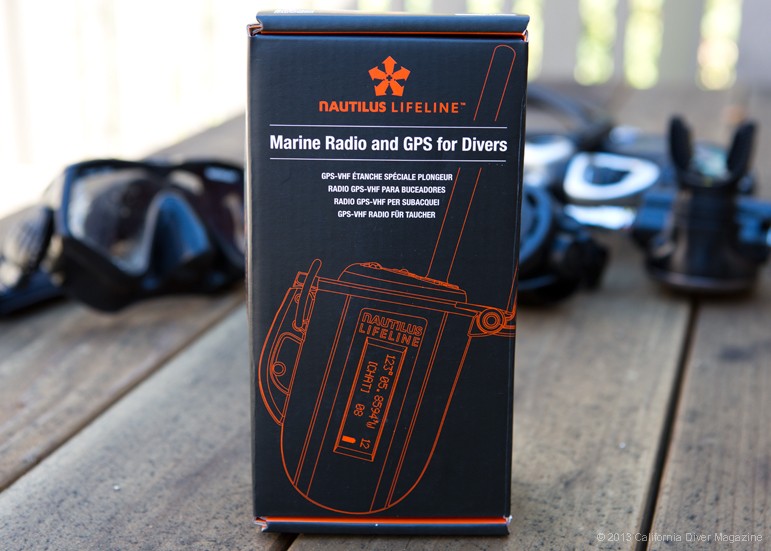
The Nautilus Lifeline is a compact, submersible handheld VHF radio with with GPS capabilities. Waterproof up to 425 feet deep, the Lifeline is carried along with the diver during their dive – in a pocket or clipped to the BCD with a D-ring. It’s a solution that is just as compact as an SMB, yet allows a diver to communicate with any boats 2-6-mile range – far greater than any other handheld safety device. (The Nautilus Lifeline has a stated range for its digital distress signal of up to 12 miles.)
Powered by an 1850 mAh lithium-ion battery, the Nautilus Lifeline’s rechargeable lithium ion battery provides 30 minutes of talk time plus 24 hours of Distress Mode transmissions. The Lifeline is compact and does not add drag, and is nearly neutrally buoyant underwater. It’s completely waterproof underwater with the clear clamshell lid latched closed, and “splash proof” at the surface with the lid open, as it would be when communicating with your boat at the surface. It comes with a standard USB cable and can be charged by plugging into a computer or standard USB wall adapter. The Lifeline case is made of Polycarbonate and 316L Stainless Steel – it’s quite rugged and durable. There is an on-board strobe light that can be activated to get attention at night.
The Lifeline can be easily programmed to communicate on any standard marine VHF channels, and comes pre-programmed to communicated with channels 16 and 68.
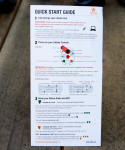
All the features in the world are useless if the unit were too complicated to use or required hours of training. Especially in an emergency situation, it’s important to keep operation simple, and the Lifeline has created a radio that passes this test with flying colors. The controls on the lifeline are easy to use and intuitive – there are literally only three buttons on the unit, and after a bit of familiarization on the surface, any diver can become comfortable in using it. The ease of use is also apparent when you first open the Lifeline’s box – all of the instructions come on a 2-sided “Quick Start Guide” card that can be easily read and understood in minutes (but of course it’s best to study up a bit more and practice with the unit before heading out on the water).
The Lifeline comes with a 1-year warranty.
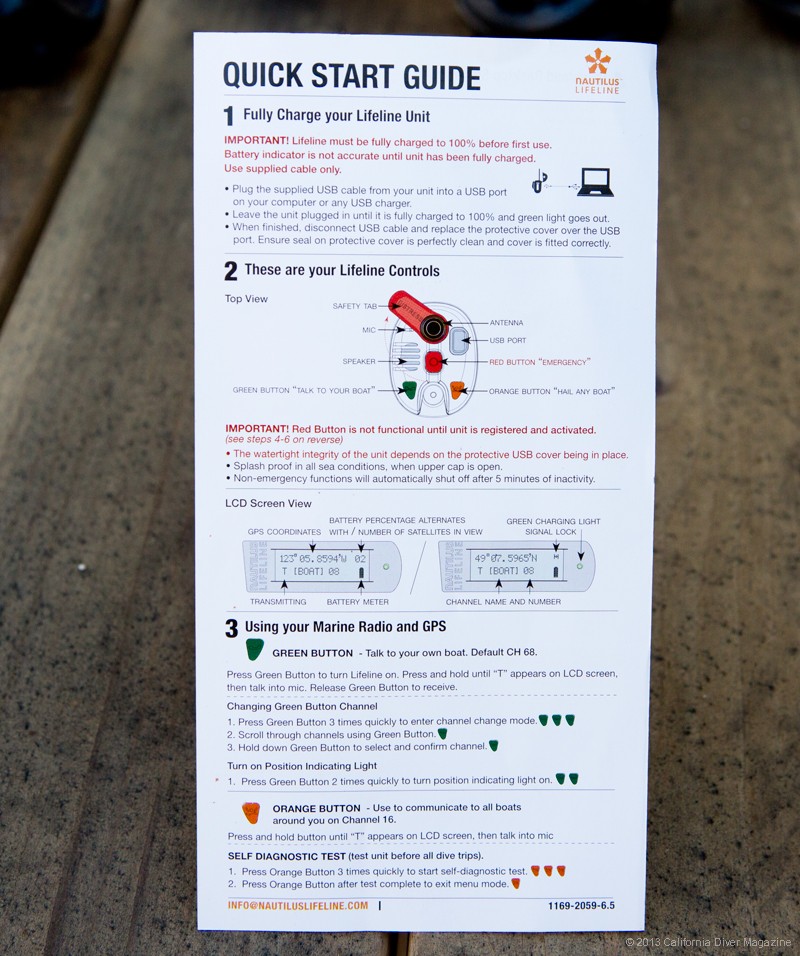
The included Quick Start card makes it easy to understand all of the Lifeline’s functions. (Click to enlarge).
Summoning Help
To use the Nautilus Lifeline to communicate with your dive boat (for an emergency or other communications), simply unlatch the clear clamshell top, flip the small antenna up, and press one of three buttons to render assistance. The Nautilus Lifeline radio uses the same VHF marine channels monitored by nearly every vessel on the water and Coast Guard stations onshore. The Nautilus Lifeline has a range of 2-6 miles – actual range will depend on local conditions. VHF signals travel by line-of-sight, and can be reduced by surface conditions and the height of the antenna over the water. Holding the unit as high as possible when transmitting a distress message may also improve it’s range.
After surfacing from a scuba dive, you first open the latch and clamshell lid, extend the black antenna, then press the green button to call your dive boat on the “chat” channel, (the Lifeline refers to this green button as the “talk to your boat” button, and channel 68 is pre-programmed into the unit). If you’re unable to reach your boat on this channel, you can press a second button (the orange “hail any boat” button) on the Lifeline to call any boat in the area or the Coast Guard. This call goes out on VHF channel 16 – the marine “Hail + Distress” channel. Every boat on the water monitors this channel, so there is a high likelihood that you’ll be able to communicate with nearby boats for assistance. Maritime law requires any vessel in the area to respond in an emergency situation.
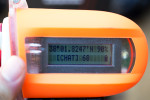
Once powered on, the GPS acquires your location multiple satellites and locks onto your current position – there’s an icon on the display screen which indicates your current coordinates. Your exact position, in latitude/longitude, is then shown on the screen which allows you to speak your location’s coordinates over the radio.
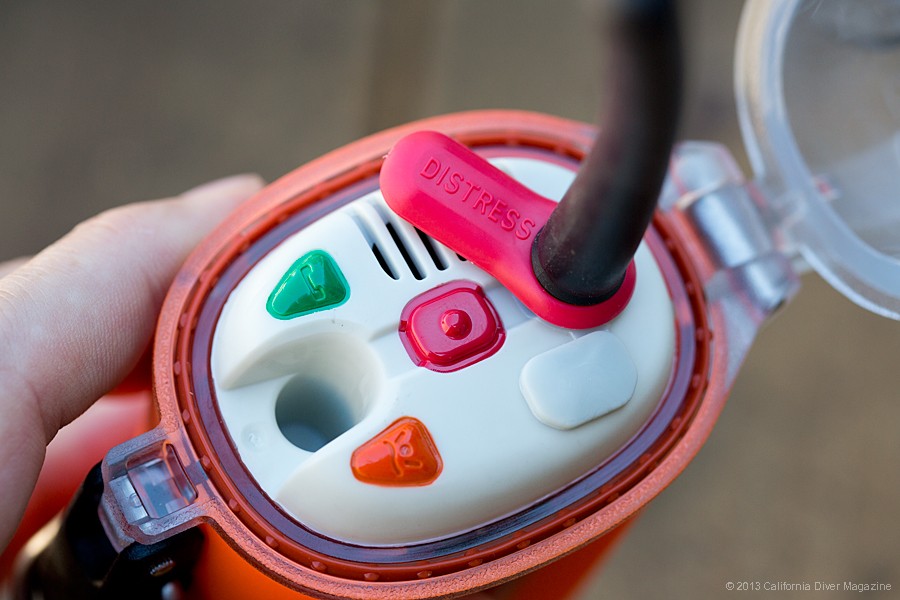
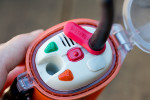
The three buttons on top are all that’s needed to chat with your boat operator, summon
assistance from other boats, or transmit an emergency distress signal. (Click to enlarge)
If you are unable to summon help on the chat channel or the hail and distress channel 16 and it’s a true emergency situation, you slide the red cover over to expose the red distress button.
Pressing the red button for 3 seconds activates the Lifeline Distress Mode, which is the digital equivalent of calling “Mayday.” The Coast Guard and any vessel within range that is equipped with a DSC-enabled VHF radio will receive your distress message and your exact GPS coordinates which are transmitted from the Lifeline. Instead of looking for a bobbing head or listening for a whistle, rescuers now know your exact coordinates, even from a miles away. The emergency transmissions will continue every 5 minutes for 30 minutes (or 7 complete transmit Cycles). After 30 minutes the transmissions reduce to once every 10 minutes, and the lifeline will go to sleep between transmissions to conserve battery life.
Important – the Lifeline’s distress mode is only to be used in an emergency situation, and should never be used to test the system or for practice. Activating the distress mode WILL result in a rescue operation being launched, and if it’s a false alarm, you can be fined and held responsible for rescue operations costs!

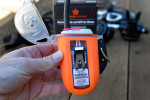
The large LCD display is easy to read and displays current GPS coordinates, indicates what channel you’re on, battery level, distress status, and other functions. (Click to enlarge)
DSC – The Lifelines’ Lifeline
The red “Lifeline” (emergency distress) button transmits a Digital Selective Calling (DSC) distress message that includes your GPS coordinates – and it’s very important to note that this is to be used only in a life-threatening situation. With this system, when a distress call is made, your personal identification and exact location is automatically transmitted to the Coast Guard and to other vessels in the area. The DSC feature requires that you pre-register your Radio/GPS with a Maritime Mobile Service Identity (MMSI) number, which is free and can be done online (instructions are included with the Lifeline). This unique MMSI is assigned only to you, and allows rescue authorities to know exactly who is in distress and supplies them with emergency contact information.
Preparing the Nautilus for the dive
Prior to diving, the Lifeline takes just a bit of setup. Once you receive it, the Lifeline requires charging to full capacity, which is easily done via the included USB cable. While most settings can be changed using the green and orange buttons on the Lifeline, it’s a lot easier to make changes with the unit plugged into a computer (software is available for both PC and Mac users). You’ll also want to register your Lifeline with the Maritime Mobile Service to get your MMSI number (it’s free, and more information on obtaining one can be found here). Familiarize yourself with the basic functions of the Lifeline (taking care NOT to activate the distress mode) and you’re ready to go.
Before each outing, there is a self-diagnostic test that can be performed to make sure all the Lifeline functions are operating properly. During this test, the strobe will test flash, the battery voltage will be measured to ensure adequate capacity for 30 minutes of talk time and 24 hours emergency distress followed by a transmit load test, measurement of internal circuit resistance and a battery voltage test. If all parameters are working properly, the Lifeline’s self-test will display the message “good to go” on its LCD screen. A quick radio check with your dive boat is also recommended to confirm you are able to communicate properly with your boat.
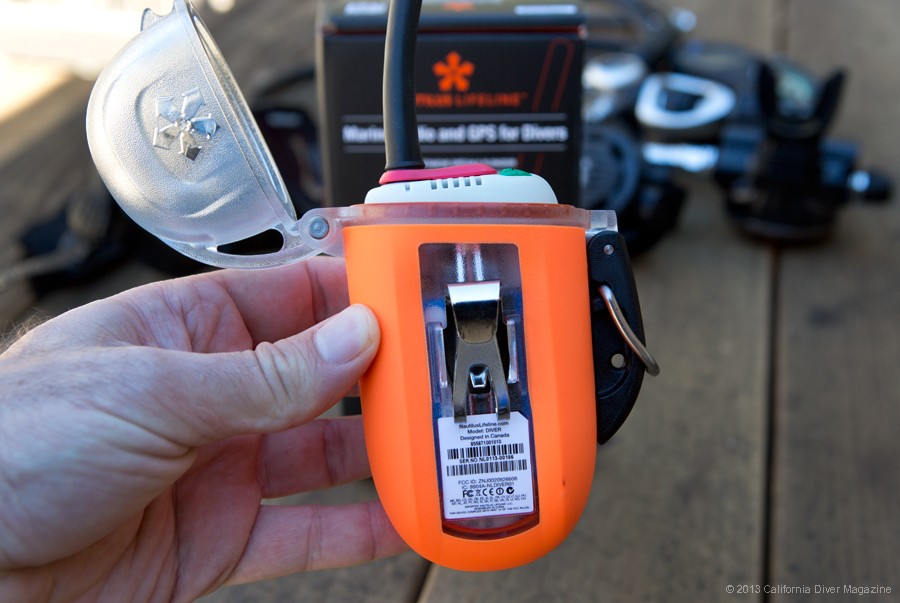
The Lifeline is best attached to your BC with a D-ring, and also includes a sturdy belt clip. (Click to enlarge)
A day on the water with the Lifeline
After reading all the documentation and registering my Lifeline online, I took the Lifeline out on the water for an afternoon of testing all the functions, ease of use, and range. Fully charged and ready to go, I clipped the Lifeline onto my BC, double-checked to make sure it was turned on, and took it for a dive. My dive buddy Brian came along as well, sans-Lifeline.
 The stated maximum depth for the Lifeline is 425 feet, so our 72-foot dive today wasn’t going to challenge this. Based on the way it’s built, as long as the o-ring under the clamshell lid is clean and intact, there should be no issues with water intrusion and I’ll never get past it’s 425-foot limit. The unit is very unobtrusive and I didn’t feel any drag, bulkiness, or otherwise notice it was with me. There is an accessory pouch available for $39.95 that will keep the Lifeline more streamlined to your body.
After our dive we surfaced via the anchor line, right next to the boat as planned. So next we did what any diver normally wouldn’t want – I had the boat drive away without me and my dive buddy, for the sake of science and testing the Lifeline, of course (it’s actually a strange feeling to pretend the boat was leaving without us. Outside of testing, I really don’t want to experience that)!
Our location was safe and out of boating traffic lanes, relatively near shore aside a kelp-covered rock (so we wouldn’t drift), and the sea conditions were calm with a light surface chop. In addition to the Lifeline, I carried an SMB, whistle, and Dive Alert. Our captain marked my position with his GPS and headed away, and we tested out the radio functionality at a range of 1- 3 miles. Although 3 miles doesn’t seem very far, when you’re a diver in the water, it’s a considerable gap between you and your surface support!
Normally, not a situation you want to be in.
Since we’re in cold, 52-degree water, I was wearing thick gloves when operating the Lifeline. Gloves can be a bit tricky with operating some dive gear, and the relatively small buttons on the unit appeared like it might be a challenge. In an emergency situation gloves could be removed however it was not needed in this case, and the radio was easy to operate with my gloves in place.
Now for the radio test. At each range (1/2, 1-mile, 1.5-miles, 2 and 3-miles), our dive boat reduced speed to idle and we spoke on the radio, evaluating the clarity of communications, and on my end the ease of operation. At each test interval, the radio functioned just as advertised, and each transmission came across loud and very clear in both directions. Up to our maximum separation of 2.5 miles, we were able to communicate with clear, loud, and unbroken communications. At the 3-mile mark our signal became a bit weaker and began to intermittently drop out, but we were still able to get the message across – similar to my experiences using a handheld marine VHF on the water in a boat. Due to the time of day, this was the maximum range we were able to test. The Nautilus Lifeline documentation states that the radio range is up to 8 miles, depending on conditions and antenna height. Our relatively small dive boat’s antenna was not as high as most commercial charter boats and definitely not as tall as a Coast Guard or commercial ship, so that would also serve to increase our range.
We were not able to test the Emergency Distress Mode, of course – that can only be used in an actual emergency. That said, it’s nice to know it’s there, just in case. The range for the digital signal transmitted in this mode is even greater – up to 12 miles.
Even though we knew our boat was coming back, having a VHF marine radio to communicate to them was a huge comfort. If it were nighttime and we were truly lost at sea, the Lifeline would have given us a huge advantage over any other form of emergency equipment, and the comfort of talking to potential rescuers would give a huge psychological boost to a panicked diver.
Additional features for boat operators
For dive boat operators, there is a feature on the Lifeline that allows all radios to be set in “Fleet” mode, where the DSC message is only received by the dive boat’s radio with a specific MMSI number. This lets the boat use the Lifeline for a continuous position report without sending false alarms to search and rescue agencies. More information can be found on the Nautilus Lifeline website.
Summary
Simply put, the Nautilus Lifeline is an excellent piece of safety gear for all divers and anyone else operating on the water. In a distress situation, the Lifeline dramatically improves the diver’s ability to contact and communicate with boats and emergency services and greatly increases the chances of being located on the water. The ability to communicate with the dive boat in non-emergency situations can also be a great benefit, and the Lifeline’s compact size, durability, and ease of use make this an essential piece of gear for offshore divers.
While the Lifeline is a great tool developed for divers, kayakers, boaters, fishermen, stand-up paddlers, windsurfers and kiteboarders should also consider adding it to their list of equipment before heading out on the water. Considering the cost, there’s literally nothing that compares to this improvement in diver safety on the water.
The Nautilus Lifeline retails for $299 (with a street price at around $250) and is available at your local dive shop or online (or at the link below). More information can be found on the Nautilus Lifeline website at nautiluslifeline.com.


-

- Lifeline’s LED display
-
- The Lifeline is best attached to your BC with a D-ring, and also includes a sturdy belt clip.
-
- GPS coordinates on the Lifeline
[AMAZONPRODUCTS asin=”B00A73JSS0″]